EC - How to Install the Zoho Assist Plug-In
Installing the Zoho Assist plug-in is quick and straightforward.
Follow these simple steps to get started:
- Download the Plug-In: Download the
Zoho Assist plug-in from the following link.
- Save the link: Save
the CustomerPlugin.exe file onto your computer.
- Install the Plug-In: Locate the file and install the file by double clicking the CustomerPlugin.exe file.
A popup window will appear with the message “Do you want this app to make changes to your device?” Click Yes
The installation window will appear.
Once the installation is completed, the Zoho Assist icon will appear on your desktop.
Renaming the Icon: Right-click on the icon and rename the icon to Easy Clocking Australia Support.
- When
you Join the Remote Support Session:
Double click on the icon. A popup window will appear again with the
message “Do you want to allow this app to make changes to your device?”
Click Yes.
The below screen will appear.
- The technician will provide you a session ID for each support session via phone.- Enter your name.
- Click on Join Session.
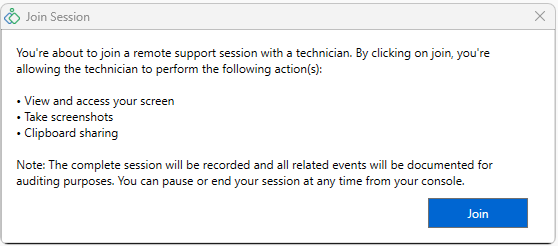
The
below screen will appear, click Join.
Please note: Our technical support
team only supports our software and our devices, and not issues relating to
your computer or network. If you are unable to install and open the remote
access software you will need to contact your IT professionals, as we are not
IT support for your environment.