TL - Creating Users
Types of Users
There are three types of Users in the software:
- USERS: Those who fall under the main User tab will be occupying the Time Clock to clock in and out and count toward your Timelogix license.
- MANAGERS: Created under the Settings > Administrators tab, do not count toward your Timelogix license and are created solely to manage the software. Managers are typically assigned privileges to access certain features/settings of the software.
- ADMINISTRATORS: Created under the Settings > Administrators tab, do not count toward your Timelogix license and are created solely to manage the software. Administrators can access all features/settings of the software without restriction.
Creating Users
To create a User, navigate to:
- Users
- General
- Select Create User
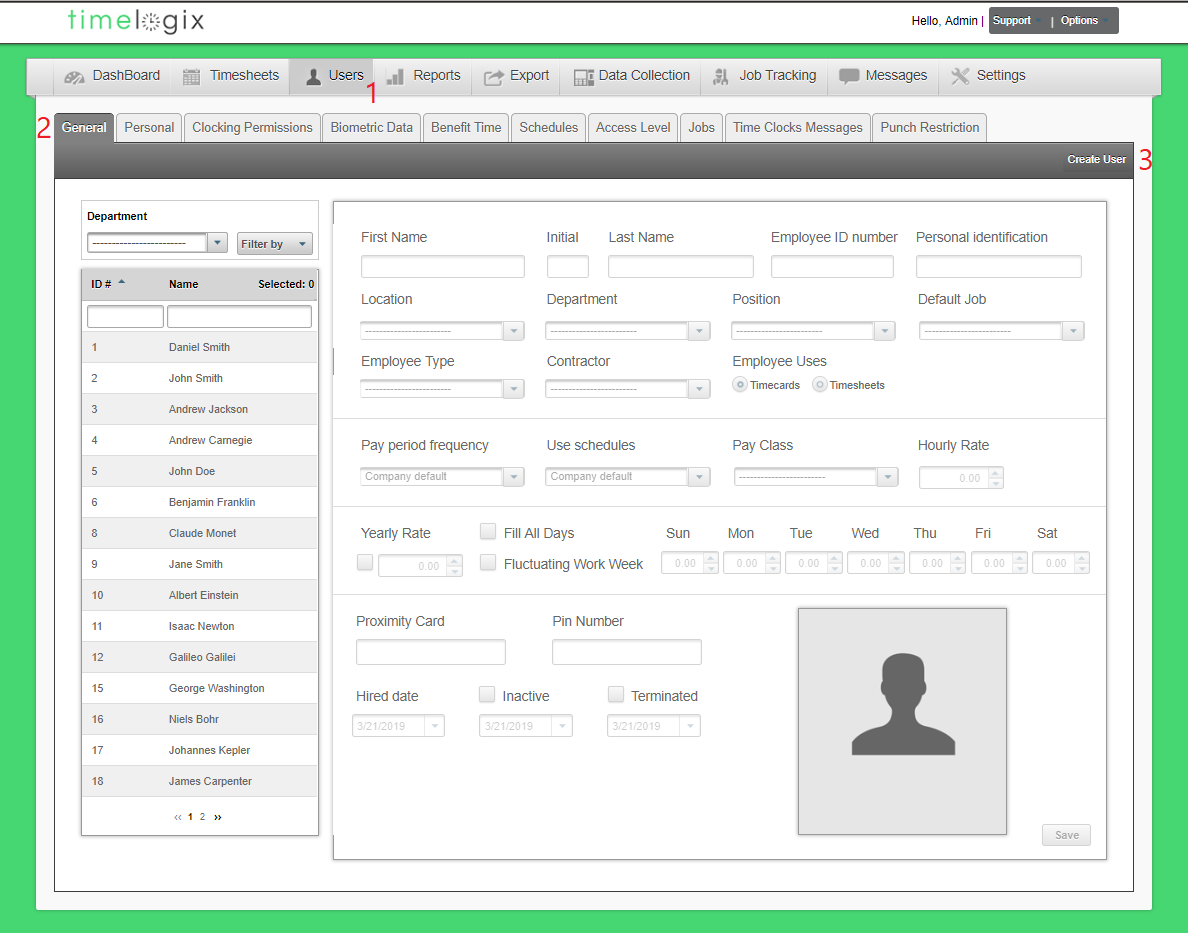
A window will appear where you will be prompted to fill in the following information:
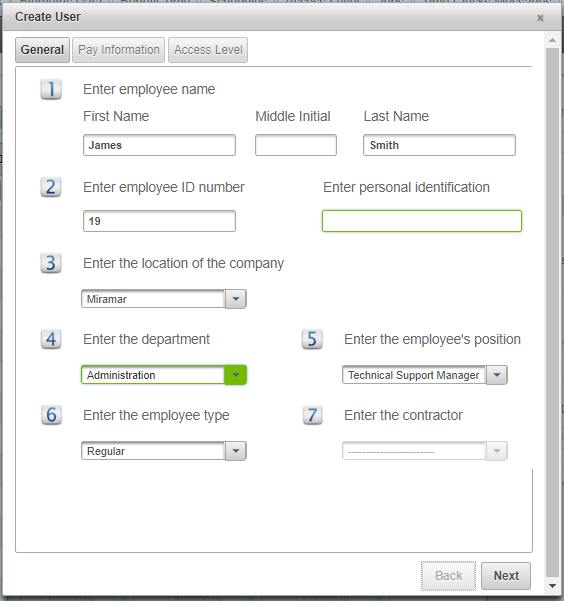
General
- Enter employee name
- First Name
- Middle Name
- Last Name
- Enter employee ID number
- Enter Person Identification (Optional)
- Enter the location of the company
- Enter the department
- Enter the employee's position
- Enter the employee type
- Enter the contractor
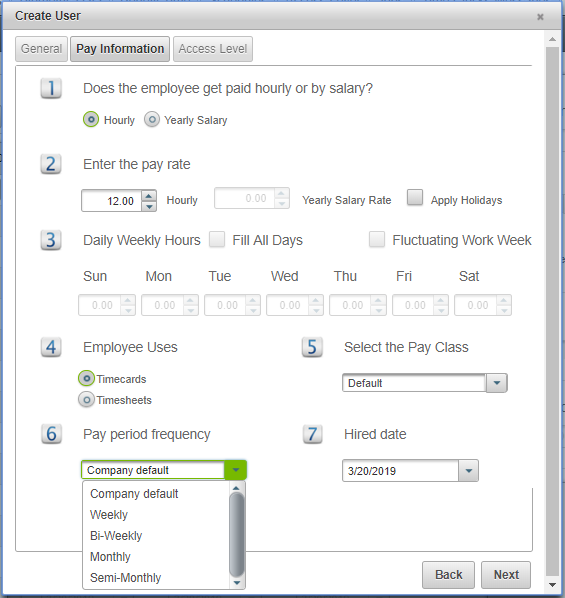
Pay Information
- Does the employee get paid hourly or by salary>
- Enter the pay rate
- Hourly
or - Yearly Salary Rate
- Apply Holidays
- Hourly
- Daily Weekly Hours
- Fill in the salaried hours per day
- Employee Uses
- Timecards
- Timesheets
- Select the Pay Class
- Pay Period Frequency
- Hired date
Access Level
- Allow access to employee portal
- Allow to manage the timecard
- Enter the username used to login
- Enter the password used to login
- Auto-generate
- Enter Manually
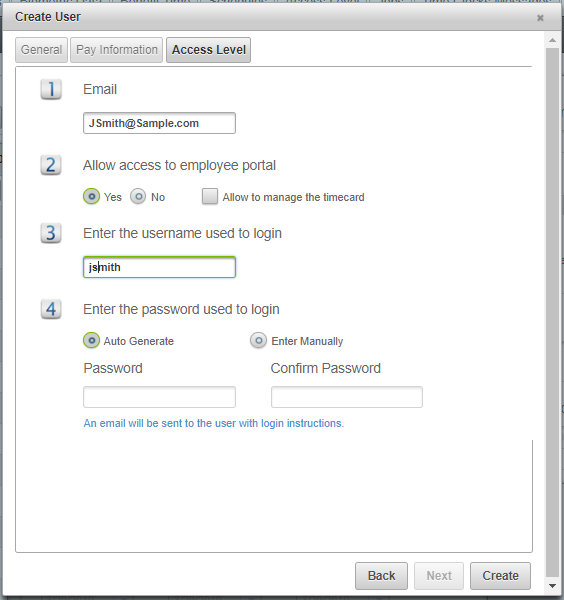
Click Create.
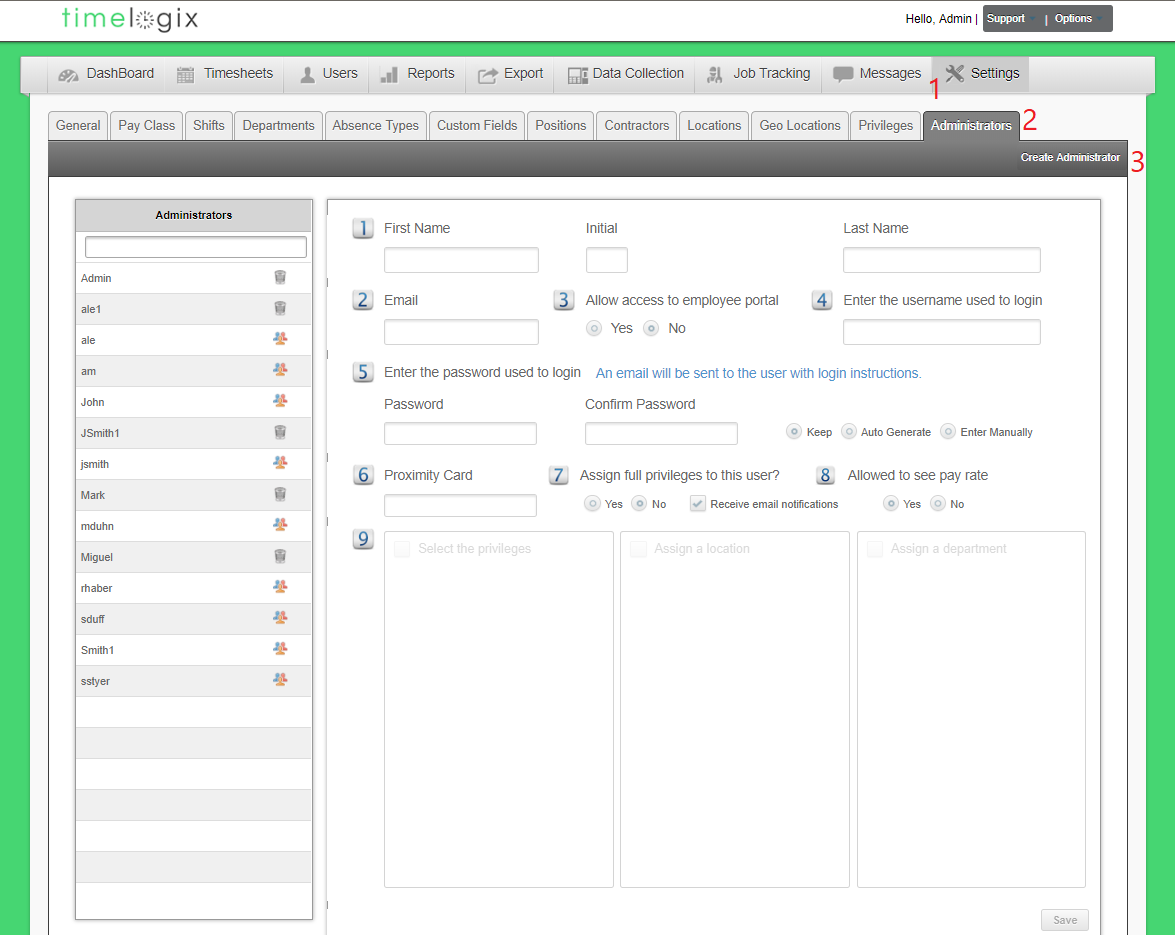
Creating Administrators/Managers
To create an Administrator, navigate to:
- Settings
- Administrators
- Select Create Administrator
A window will appear where you will be prompted to fill in the following information:
- First Name
Initial
Last Name - Enter the username used to login
- Enter the password used to login
- Auto-generate
- Enter Manually
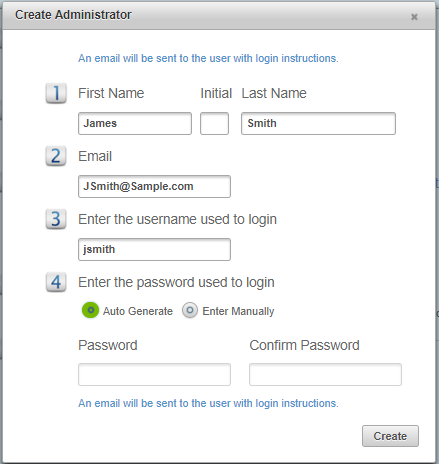
Click Create.
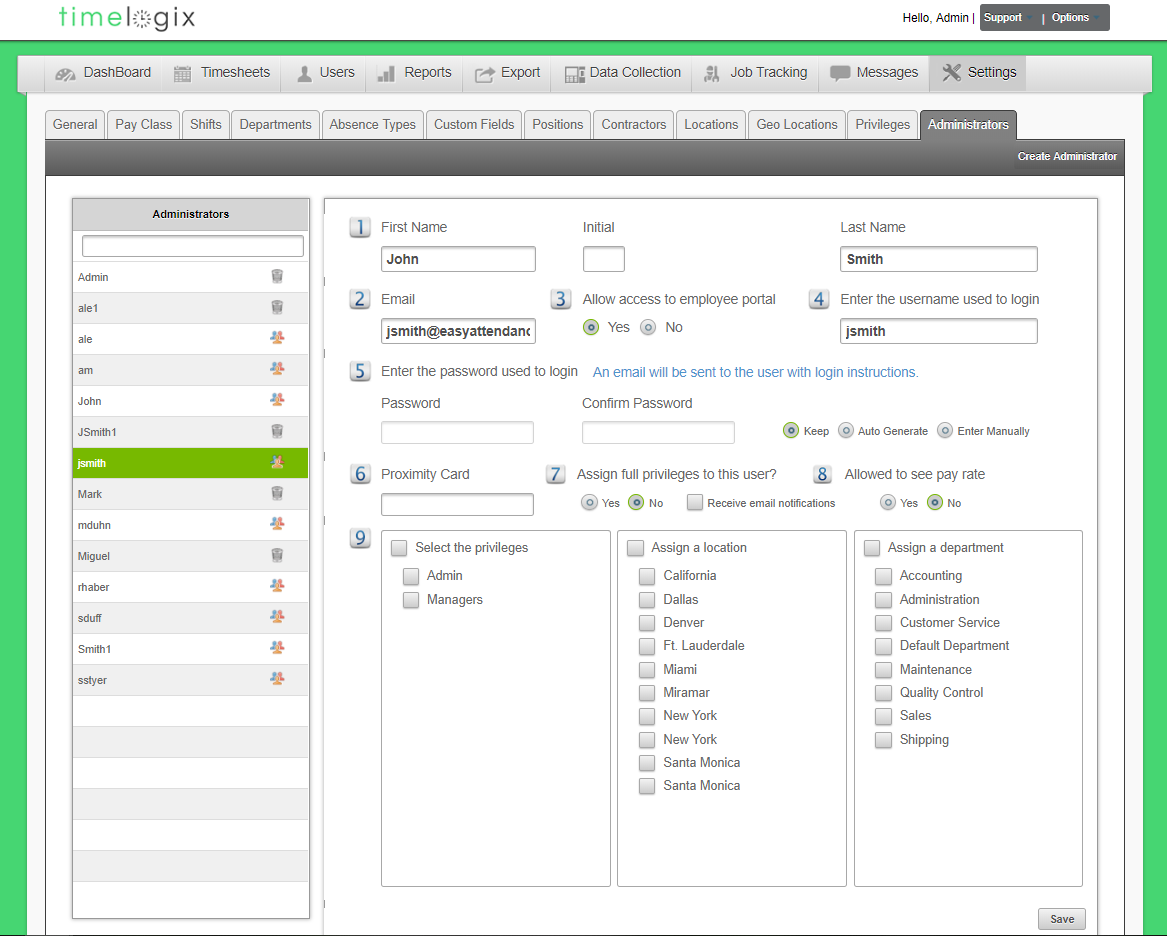
Once created, you will be taken back to the main Administrators page. You can then configure the privileges for the Administrator or Manager.
- First Name (Already filled in.)
Initial (Already filled in.)
Last Name (Already filled in.) - Email (Already filled in.)
- Allow access to employee portal
- Enter the username used to login (Already filled in.)
- Enter the password used to login (Already created. You can change the password here, or Keep the original password.)
- Proximity Card (If applicable/Imported from Time Clock.)
- Assign Full Privileges to this User: Selecting YES creates an Administrator. Administrators can access all parts of the software and make any edit or change necessary, without restriction. If you select NO, the following prompts will become available:
- Allowed to see pay rate: Managers can be restricted from viewing user Pay Rates via this option.
- Select the privileges: Select the privilege group that pertains to this manager.
Assign a location: Select the locations that pertain to this manager.
Assign a department: Select the departments that pertain to this manager.
Easy Clocking Support Team Contact Details
Related Articles
TL - Creating Users
Types of Users There are three types of Users in the software: USERS: Those who fall under the main User tab will be occupying the Time Clock to clock in and out and count toward your Timelogix license. MANAGERS: Created under the Settings > ...TL - Creating Schedules
Creating Schedules To setup Scheduling, navigate to: Dashboard Schedules Select the User(s.) To select more than one User, you can hold CTRL on your keyboard + click on the user's names. You can also click on the check-mark box next to the name ...TL - Locations
Locations work as another filter in the software. The location is assigned to both Users and Devices. To create a Location, navigate to: Settings Locations Create Company Location When creating Company Locations, the following window will appear: ...TL - Locations
Locations work as another filter in the software. The location is assigned to both Users and Devices. To create a Location, navigate to: Settings Locations Create Company Location When creating Company Locations, the following window will appear: ...TL - Contractors
Our Contractors tab is available in the case that you have any Contracted users within your company, and want to associate this field to the user profile. You can also use this field as another filter for your employees throughout the software. To ...